02 November 2013

Foundation Work September/October 2013

Hi All!
It has definately been a while since my last post, I'm going to try getting on a lot more frequently to update you all with new material and keep up to date with all the stuff that is happening.
What has been happening since the last update I hear you ask, well a number of images have been posted to the facebook community 'Marcos Cars' in drips and drabs, basically we had a scare with the chassis in that because the front end has suffered an impact at some stage, we thought the impact had travelled rear ward and distorted the base cross members behind where the seat backs would be, this was put in a jog after 2 weeks waiting and found to be square, so panic over. Since then however Rory (Marcos Heritage spares) has advised that due to the huge level of Waxoyl protection within the chassis rails I cannot now proceed with my original plan of galvanising and powdercoating the chassis. I can even just revert to Just powdercoating the chassis as again the level of wax oyl will cause it all to be melt once the powdercoating process heats the paint to about 400 degrees. so the plan now is sell what will be a fully restored ORIGINAL chassis and the proceeds will be used to buy a new one ready Galvanised and drilled I will of course get Redditch to powdercoat for me as their work is top draw!

The downside of all of this is that my plan to be at the NEC Classic with a naked Marcos will sadly not be coming to fruition with all the issues that I have described above.

I have started buying all the new bits needed to completed the running gear and most under body items. we are off to the Bristol Classic vehicle restoration show show at Shepton Mallet tomorrow to get a few more bits. Below are some piccies of the latest new bits.

Shot blast and Powdercoated Triumph GT6 wishbones and Coil spring. together with bracket and Pedal box shroud
I have opted for Satin Black on all the dark bits of the running Gear, opting for a dark metallic blue for coil springs on the car to go roughly with the colour I intend it to be. the colour is going to be either a Jaguar flag blue, or the Rolls royce Sapphire blue used on the 1995 racing LM600 as it is a gorgeous colour.

Close up of the metallic Blue powdercoated spring (1 of 4)
Close up of the Wishbones (Satin Black)
 We have also been servicing the Half shafts for the new rear axle a Capri standard differential 3.0.9 ratio these again were serviced with new bearings and rear drums machined to fit my wheels. This was also carried out by Marcos Heritage Spares (Major plugs for them in this thread!) together with the rear axle refurb, I have also been painting the prop shaft which has a new UJ and flange (below) as the old one would not have fitted the new axle.


picture below shows the new bearings fitted these were machines and refurbished by M.H.S

Prop shaft and new UJ assembly
Also returning from the M.H.S machine shop were the rear drums which have been machined to Triumph PCD's to be fitted to my existing Alloy wheels the ford ones are also in place on the same drums.

Drums prior to treatment with the abrasive disc attachment to remove rough dirt and surface rust.

Paint application
Once the drums were rubbed down with the sanding wheel we began with the first two generaous coats of Hammerite smoothrite which treateds existing rust, also protects against future rust and ensures these stay looking great.

Drums following the first and second coats.
What I only realised a week after getting back all the suspension parts, was that the rods I took (Suspension radius rods and the rear panhard rod were missing, the job lot of bits got seperated at the works) note to self to properly itemise all my bits in future!!! Pictured below are the newly shot and coated rods.


So this weekend Iwill be finishing off the spraying of the drums, the prop shaft and the steering rack that I started all that time ago, together with fitting new bushes and rose joints to both the steering fitting on the chassis and the panhard rod a fairly lengthy shopping list is going with me to Shepton Mallet also.

More Next time!

22 August 2013

Chassis Work July August 2013

Hi Followers! Has been a hugely long time since updating the blog last there havent been a massive number of opportunities to update or do work until July started.
The first of the major updates is that from early February when it was snowing we moved the chassis from its then home to Wiltshire where more work can commence with power nearby etc. the latest news is I have now acquired a large Garage fortunately right next to my dads one so that we can work in away from the grip of the elements.
Great also to use an existing Marcos V6 as a pattern for measurement etc.

The main focus of the last few months has been to repair the damaged front chassis rails, as you will see from the previous blog a botched repair ages ago has caused the rails to eventually drop and pull the upper rails into a slant meaning that the front end of the chassis was dipped down by 5/6 mm see the piccy of new chassis rail in place.
The problem seems to have arisen from two sections of chassis rail that have been welded back together with a wrap around piece of metal and of course over time especially with the weight of that cast iron lump has bowed the chassis members.

We have cut out carefully the top and bottom rails from the drivers side, ensuring that all the wishbone mounts and horizontal sections were kept as tidy and as uncut as possible.

The base chassis rail was cleanly removed and this was taken straight to Rory at Marcos Heritage to fabricate to the jigs a brand new base rail it's not cheap @ £102.00, but it means that its been properly jigged to the cars specification and what I wanted was a 'proper factory job' the drivers side will have effectively have been totally rebuilt with the right dimensioned stell box sections, I had bought box section from a place in Chippenham but it was marginally too big so I acquired more from Rory as he has exactly the right stuff.

Please see some images below of the latest work.....

Flood lit view from my car parked up to the front prior to work 
Measuring up and positioning using copius numbers of G-clamps and slider clamps.

Tack Welds of the base rail to all the horizontal members.
More tack welding of the engine bays rear most spar.
We are probably going to tack weld into position first then work on the right side next as we have had a few problems with the welder not feeding the wire continuously so will probably outsource this shortly with friends. 
Chassis viewed from the rear.
Also in the last few months has been the opportunity to acquire some new parts and Im pleased to say I acquired not only the Weber 38 DGAS i had been after but it was also immaculate and procured for practically nothing considering a 'good' one fetches nearly £300+ I also got a pair of 40 DCNF's as a restoration project but that can wait for a while until i decide I want to use loads more fuel!

Photos below show the DGAS fitted currently to a brand new pinto manifold......


38 DGAS with Pinto manifold and Pipercross air filter.
Since I acquired all this stuff for the car, I have brought all the running gear, track rod ends, brake back plates vertical links, wishbones etc back to Banbury with me to be able to take to recommended specialists, redditch shotblasting and powder coating are the ones who have been throughly recommended for this work as im told their powder coating will stand up to everything thats thrown at it theyve even said its soo good you dont even need to galvanise a chassis! (I may still do this for piece of mind).

I have today 22-08-2013 taken all the running gear to This company to be treated so it's now all out of my bedroom! You cannot get more manly than that! sharing a room with car parts! :D

So that's all from me for the moment, I plan on working with dad over the next few weeks to remove the passenger side base rail in order to get that refabricated with Rory and welded in before a few extra bits and the final chassis treatments are done.

Thanks for reading. G.

26 February 2013

Chassis Refurbishment 25-26/02/2013

Recently in my last post we transported the chassis to where I could work more easily with other family and friends, it has been obvious from the start of the project that the top front chassis rail (where normal Marcos 3.0 Litre cars have radiator brackets mounted) needs replacement as a number of brackets etc have been welded and subsequently ground off in turn.
The car has has an odd stance where it used to stand, I was sure it was fine, but on looking at the chassis when the body was off it looked as though there was a bending effect on the drivers side, I initially put this down to it 'not being on a level surface' as the floor of my shed slopes down toward the front door.

Since transport and the chassis being placed on the axle stands on a level surface, it appears that the Drivers side top and bottom rails are bent and that a packing job has been done on the base rail of the passenger side rail also so common sense would be to replace all of them to ensure that weaknesses dont occurr further down the line and due to the fact I'm galvanising this chassis you cannot easily weld and maintain a good treatment to the chassis once it is galvanised.

Below are some pictures of the chassis some work already done to the front top rail replacement.

Cuts made with an angle grinder cutting disc
Front end minus the modified top rail the residual chassis section on either  side will be chopped out to tidy the re-welding area.
As mentioned above, the chassis rails were shown to be bent downwards, the new chassis steel we have bought is completely straight, this was offered up as a guide and proves that the drivers side is amiss.

view from the interior of the chassis
Rail viewed from the outside of the chassis
Below is a picture showing the passenger side rail:
  
Straight chassis rails, note the metal plate welded to the top side of the bottom rail just behind the upright.                                  

I made a trip over to Marcos Heritage spares this afternoon to ask Rory's advice on how we should proceed Rory strongly advised that if a problem exists then every effort should be made to correct the issue particularly as I intend to galvanise this chassis. The advise was also to use the fron bulkhead chassis rail as the point to work from replace the top and the top front chassis rail then work from these on the base rails and this should then correct the issues with my front end.

Well as usual, there will be further updates on this as and when we make the changes to the chassis.

10 February 2013

Some progress at last!

So as I have spent the last three months getting every bit of Overtime I can, I have started doing a few jobs that dont cost much first of all, but are vital in insuring that I have enough cleaned up and restored parts ready for re-assembly, now rather than document individual entries from the last couple of months I'll condense them for more interesting viewing into one post.
First of all, I've been returning to the clean down of the engine, the steering rack and prop shaft. These are all a bit grubby so out came the tin of Gunk and I applied this generously to the parts that needed it, rinse off with a pressure washer and then one more coat of gunk to make sure.
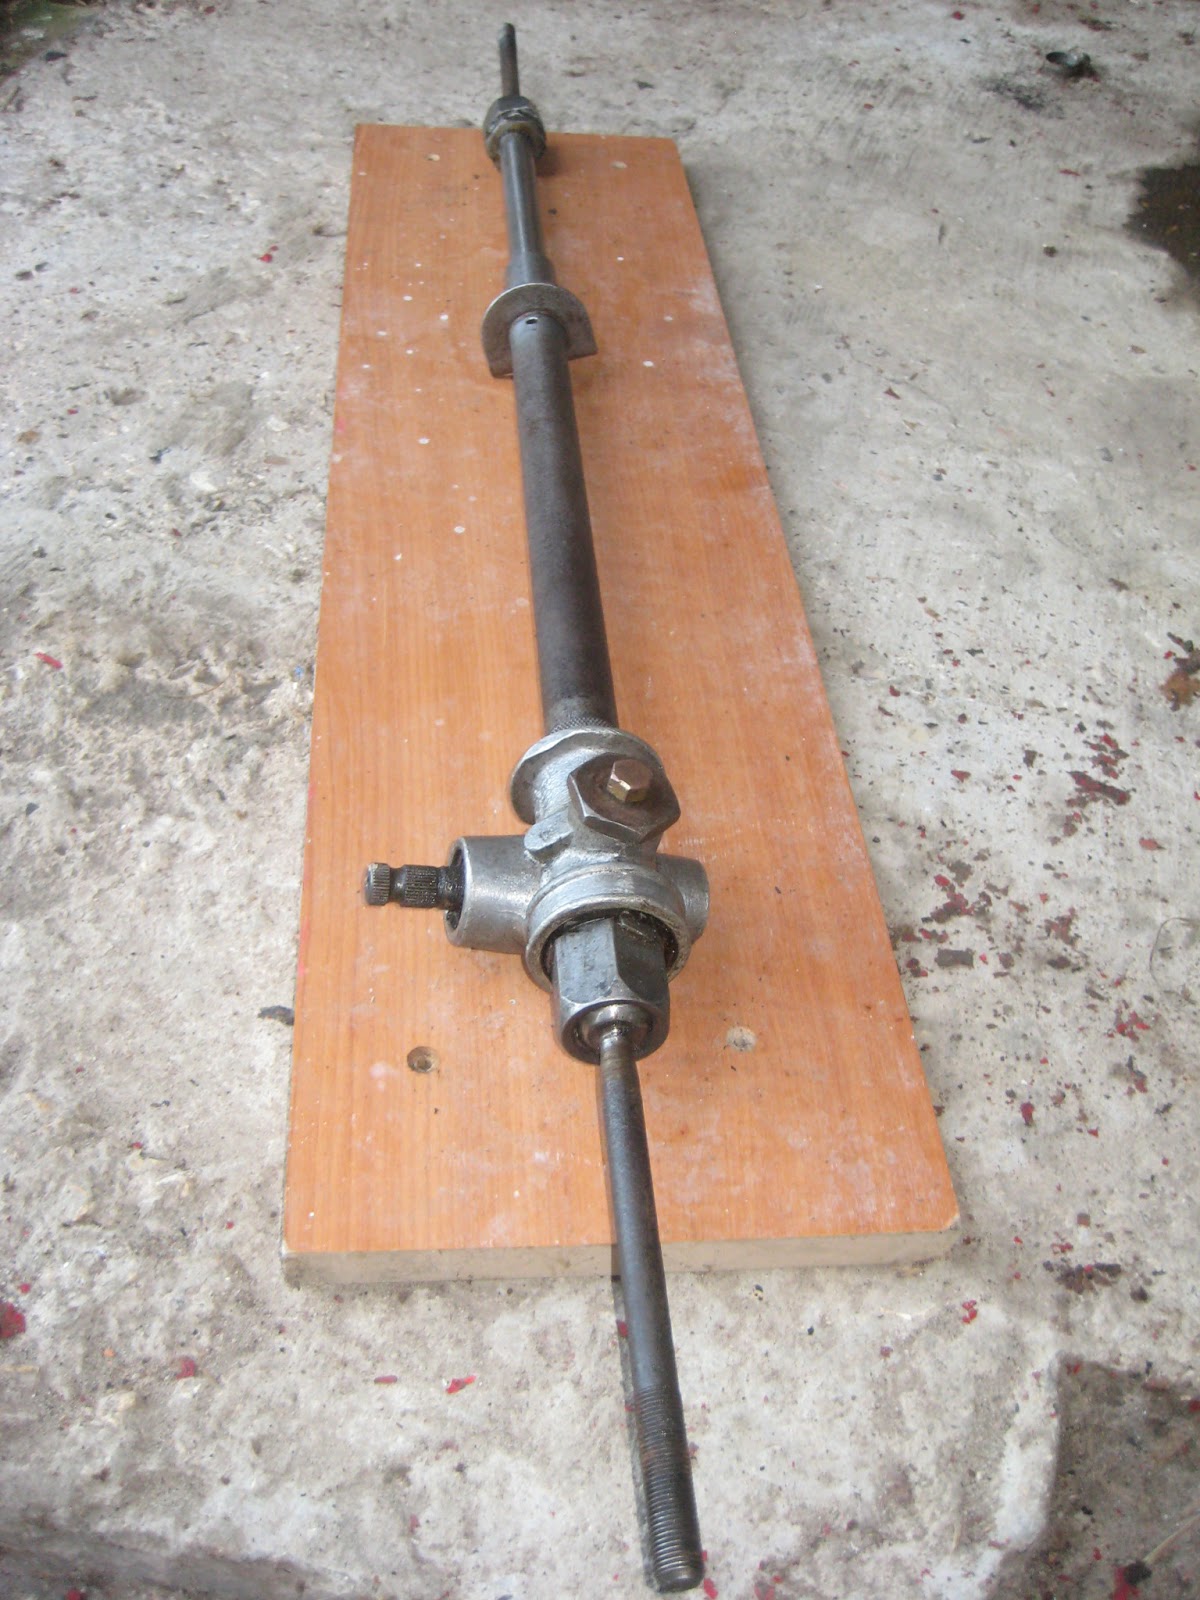
The steering rack was really grubby, its position on the chassis means it collects dirt from road going, and any fluids that have leaked from the engine lump itself (Grease/oil etc). I also had to remove the bushes from the each end of the rack as these are starting to perish they are held on with twisted retaining wire rather crude looking but took me long enough to get the damn things off!

Prop shaft 'Pre-degreasing'


The Steering Rack was coated in gunk and wire brushed to the point that oil and grease was dropping off the item, Again the process above has been repeated and a rinse off done.

Wire brushed and degreased steering rack looking great!
Following the clean down of the steering column, I broke out the Hammerite rust protector paint and applied a reasonable coating once the moving parts and bits that need to remain as are were covered. the central part of the rack is a solid tube that can be painted, care must be taken as looking round the tube there is a small hole almost like a breather hole where grease might go into lubricate the joint, ensure this is well masked off to avoid spraying paint into it that will eventually dry and potentially block the hole entirely. I made a bit of an error here as it was really cold in the garage and this was affecting the rate at which the paint would dry, also the coverage looked a bit patchy so thankfully this was only a light coat.


Once this was done I turned my attention to the prop shaft which had been degreased and rinsed a couple of times, this was also now ready for coat number one. Again using the satin smoothrite spray paint I set to work. I actually suspended this from the rafters of the shed as it gave me an unrestricted area to spray round.

I have now after all the fun and games of these parts arranged the transport of the chassis to be altered, the front end to be re built to the original specification as the modification made before is neither exact nor is it pretty!

Here are some piccies of the chassis out in the cold light of day for the first time in a couple of years.


An eventful and busy couple of weeks will follow as I have some time off booked, to add the bracing to the chassis that will stiffen it up firstly, and then allow a tidier appearance to the front end that will mean I can send it away for the all important shot blast, galvanise and powdercoat that will protect the chassis for many more years and add value in the long term. I dont really want to have to strip this car down again very soon!

29 December 2012

Purchasing Bits

Well, since it has been a while since I last updated this blog I thought I would share some of the latest developments in my world.

Recently had a chance to visit the Shepton Mallet Classic Restoration show, which was good even though we'd had a hell of a snow shower in that region. Whilst at the show I had managed to secure a fairly long section of Dark grey carpet to match the leather interior of the car in my mission to cut down on the sheer number of colours in use inside the car. White/Grey/Black and blue and red.

Also purchased som new Light covers and some Smiths Gauges to replace the ones that are not in a good state at all currently.

Since this show I have also visited the NEC Classics show and was given a new pair of Bonnet inserts in Marine Ply so that I can replace the ones I have that are rotting through.


I have also been in contact with another forum member who was able to supply me with brand new Laser Cut Radiator brackets which will be fitted to the front of the chassis at the same time that we re-model the A-frames at the front which the bonnet will eventually be mounted to.

Basically things will start mving again very Quickly over the next few months as Im now doing massive amounts of overtime to pour money into this project in order to get her finished for the spring of 2013 or by late this year so that I get enough time to get everything right before the highly anticipated Luxembourg trip in 2014 (Which I want to be a smooth reliable affair with this car!)

22 August 2012

Final chassis stripdown/ Engine Clean


This week I had some quality time with the car again! weather was perfect for it too. I   had one or two final things to strip from the chassis, these were the Fuel line cable, the rear Brake line hoses that run along the centre of the chassis to the front of the car, and removal of the fuel pump which was still attached to the front of the fuel line (I had run out of time for all these when I last worked on it last October/November. The Brake cabling is eventually going to be all braided hosing (Looks nice and to comply with modern safety requirements) so what is there currently can be stripped and just used as a sizing guide. (Excuse the milk carton 'Rat/Mouse Bait' container, we do have little critters running around here at times)

View of cabling running along the 'Gearbox tunnel' rails
I used some snips to cut through the cable ties these arent a problem to replace same applies for re-assembly really.

Remaining hoses at the rear and the sticky/cable ties holding these final items in place.
After all these items were taken off I was left with a completely bare chassis which now only requires a bit of cutting and re-welding on the front end, and then it is ready to be trailered away for shotblast/Galvanise/Powder coat in Gloss Black.

Focus then moves to the Engine, it is a very grubby looking beast at the moment and as this is another of those little jobs that requires only the purchase of some de-greaser I cracked on without hesitation.

Using a stiff paint brush, (With all items in place) I dabbed on the GUNK Degreasant (Pictured Below costs about £4.99 for this size of tin, there is also a spraycan version) to as many parts of the engine as possible, (Rocker covers, manifold cover, timing cover, Block etc.) SAFETY GOGGLES AND GLOVES/MASK essential Here.

You can see the grease and oil already starting to run down the front of timing cover

Above is a first picture showing the early stages of application, now as most of the outlets/inlets to the engine are covered by the manifolds carb, covers, it is fairly safe to pressure wash the engine as this will give away any areas of grease that are still in place, just apply More Gunk to the affected areas and rinse off I sprayed carefully using a Turbo Lance on a pressure washer, it sprays in an oscillating high powered action that has conveniently removed the flaky paint from the Rocker Covers and the Block itself (In Red) This will be rubbed down and re-sprayed in a High Temperature colour yet to be determined, There are further piccies below that show the progress.

Immaculate shiny Bell Housing required minimal cleaning.
Grubby Greasy Timing Cover.
Engine During GUNK application
Initial Spray Down showing a vastly more clean manifold cover and loose paint blasted off the Black Rocker covers.

The plan for the Black Rocker Covers is to have them blasted and Chromed so that I have a nice shiny engine, possible engraving on these covers with the Marcos Badge?

That was all I had time to cover this weekend, hoping for more summer visits to do some more work but really at this stage, the major work is to get the chassis prepped for treatment which is going to be exciting, whilst I also look for a new home for the Marcos in order to be closer to where I live so I can just 'pop out' to work on it as opposed to driving for an hour and a half each way.

More Soon.

Gazza


03 July 2012

03-07-2012
Hello!
Not a great deal to report unfortunately, which is sadly due to lack of funding at  this moment in time I have pretty much stalled on the restoration, I'm doing a few small jobs that dont require a great deal of cash eg cleaning up the major parts of the Engine and cleaning down the Gear Box.
Very shortly I may start degreasing the tunnel section of the bodywork so that I can have this already for when heat resistant material is put down on the areas where heat is likely to affect the bodywork.
Weather has not been especially good either, but have gotten into my dads Garage as he has recently purchased a reserve Essex V6 unit to work on as a side project, this particular unit used to be from a Gilbern Invader and has a number of modifications that give a few additional features the layout hasnt changed much either. Im also looking to house the vehicle Closer to me shortly so that I can get access to work more easily on it and when I have some spare time to do so /evenings etc.